Idaho Secretary of State
|
| Print Close |
To file an amendment of Secured Party Deletion, continue to follow these basic steps:
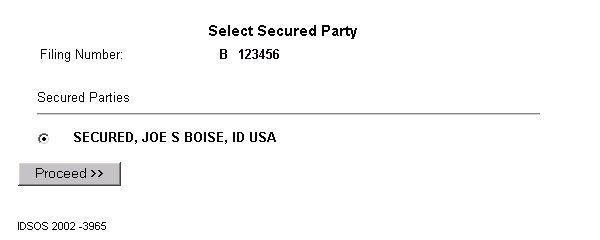
5) Select the name of the Secured Party you wish to delete then click the Proceed >> button to continue.
(Sample Secured Party Select
Screen)

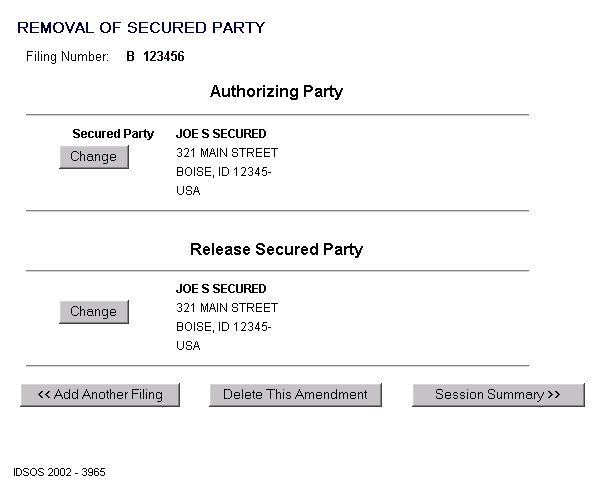
6) The Deletion of Secured Party Verification screen below contains the name of the authorizing party and the name of the secured party to be released (deleted). Ensure that all information is correct then choose from the following options:
(Sample Deletion of Secured Party Verification
Screen)

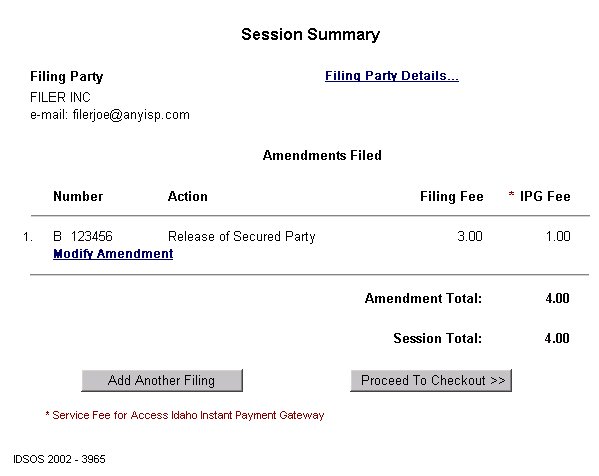
7) The Session Summary screen below contains a filing party, type of filing and the session total fee. If you would like to view or modify the information for this filing follow these instructions.
(Sample Deletion of Secured Party Session Summary
Screen)

When you have finished entering and editing the amendment information, it is strongly recommended that you carefully review the contents of each filing for completeness and accuracy.
Pursuant to IDAPA 34.05.06, Section 4, Item 406, "An error by a filer is the responsibility of such filer." See the section Reviewing Your Session for further instructions.
8) Clicking the
Proceed To Checkout >> button takes you to the
Proceed to Checkout screen. (See sample screen below)
From here you have two options:
(Sample "Proceed to Checkout" Screen)

When you have completed Access Idaho's Instant Payment Gateway process, the screen below will appear indicating that the filing process is complete.
(Sample Deletion of Secured Pary Confirmation Screen.)

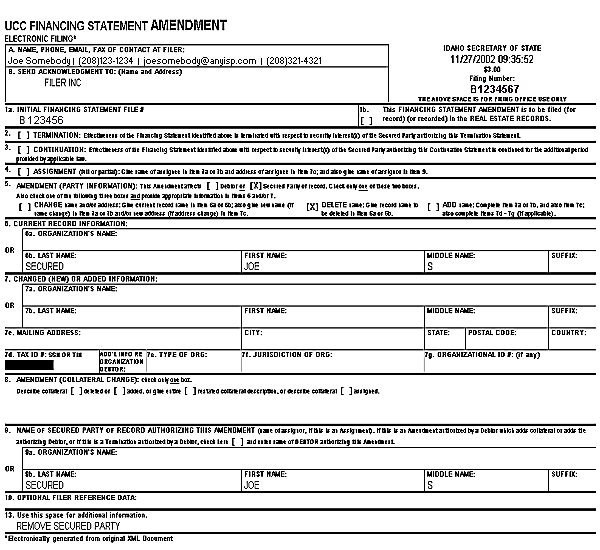
NOTE: The Filing Image is your receipt. Please DO NOT forget to print a copy of each image for your reference.
(Sample Deletion of Secured Pary Filing Image)

Once you have reviewed and printed ALL the filing images, you have completed this Filing Session!